Kindle DX Graphite as an E Ink Clock
 10 minute read
 Published 14 June 2020
 rust
rustRecreating my broken songbird clock as a digital smart clock.
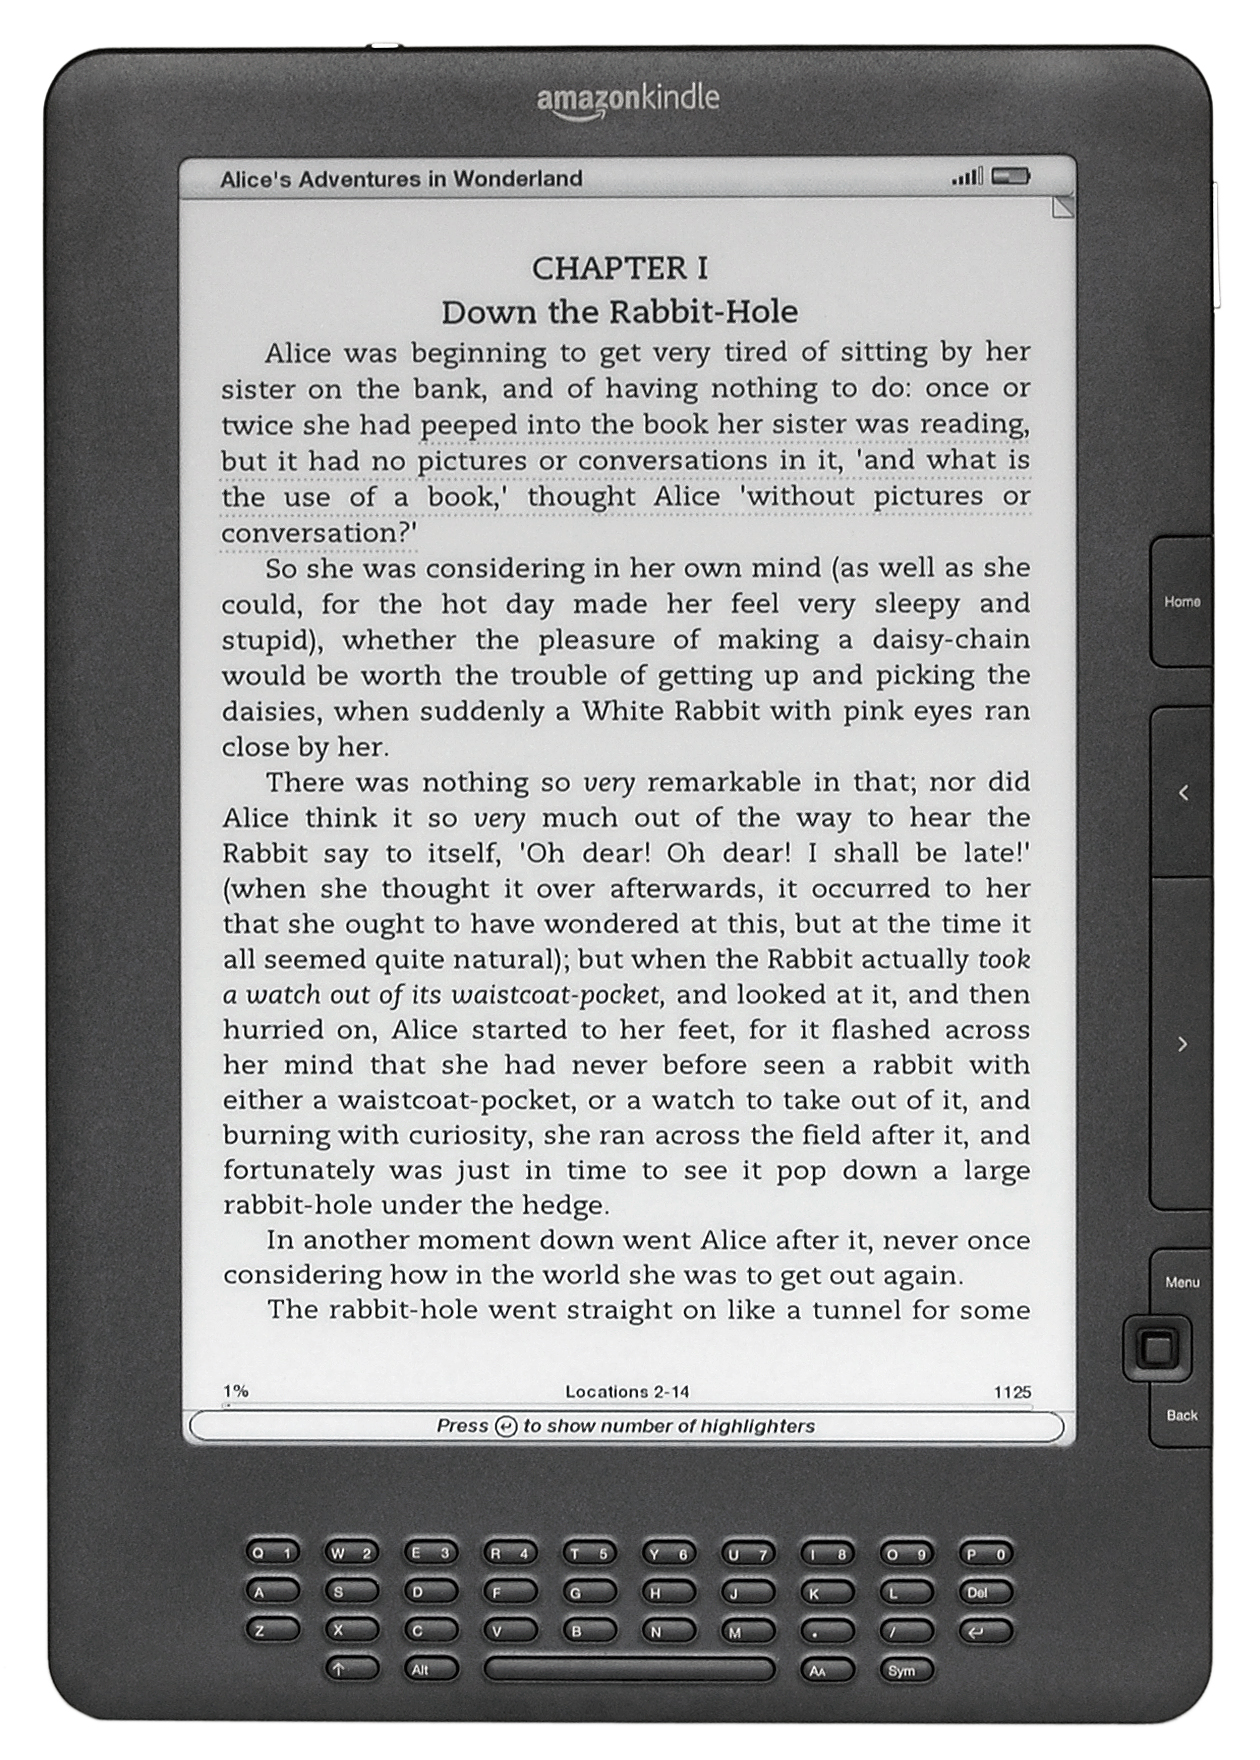
Last summer, I bought a used Kindle DX Graphite:
 User:Evan-Amos Public Domain, via Wikimedia Commons
Originally released in 2010, the Kindle DX Graphite has a large 9.7“ E Ink Pearl display, a full QWERTY keyboard, and audio playback capabilities.
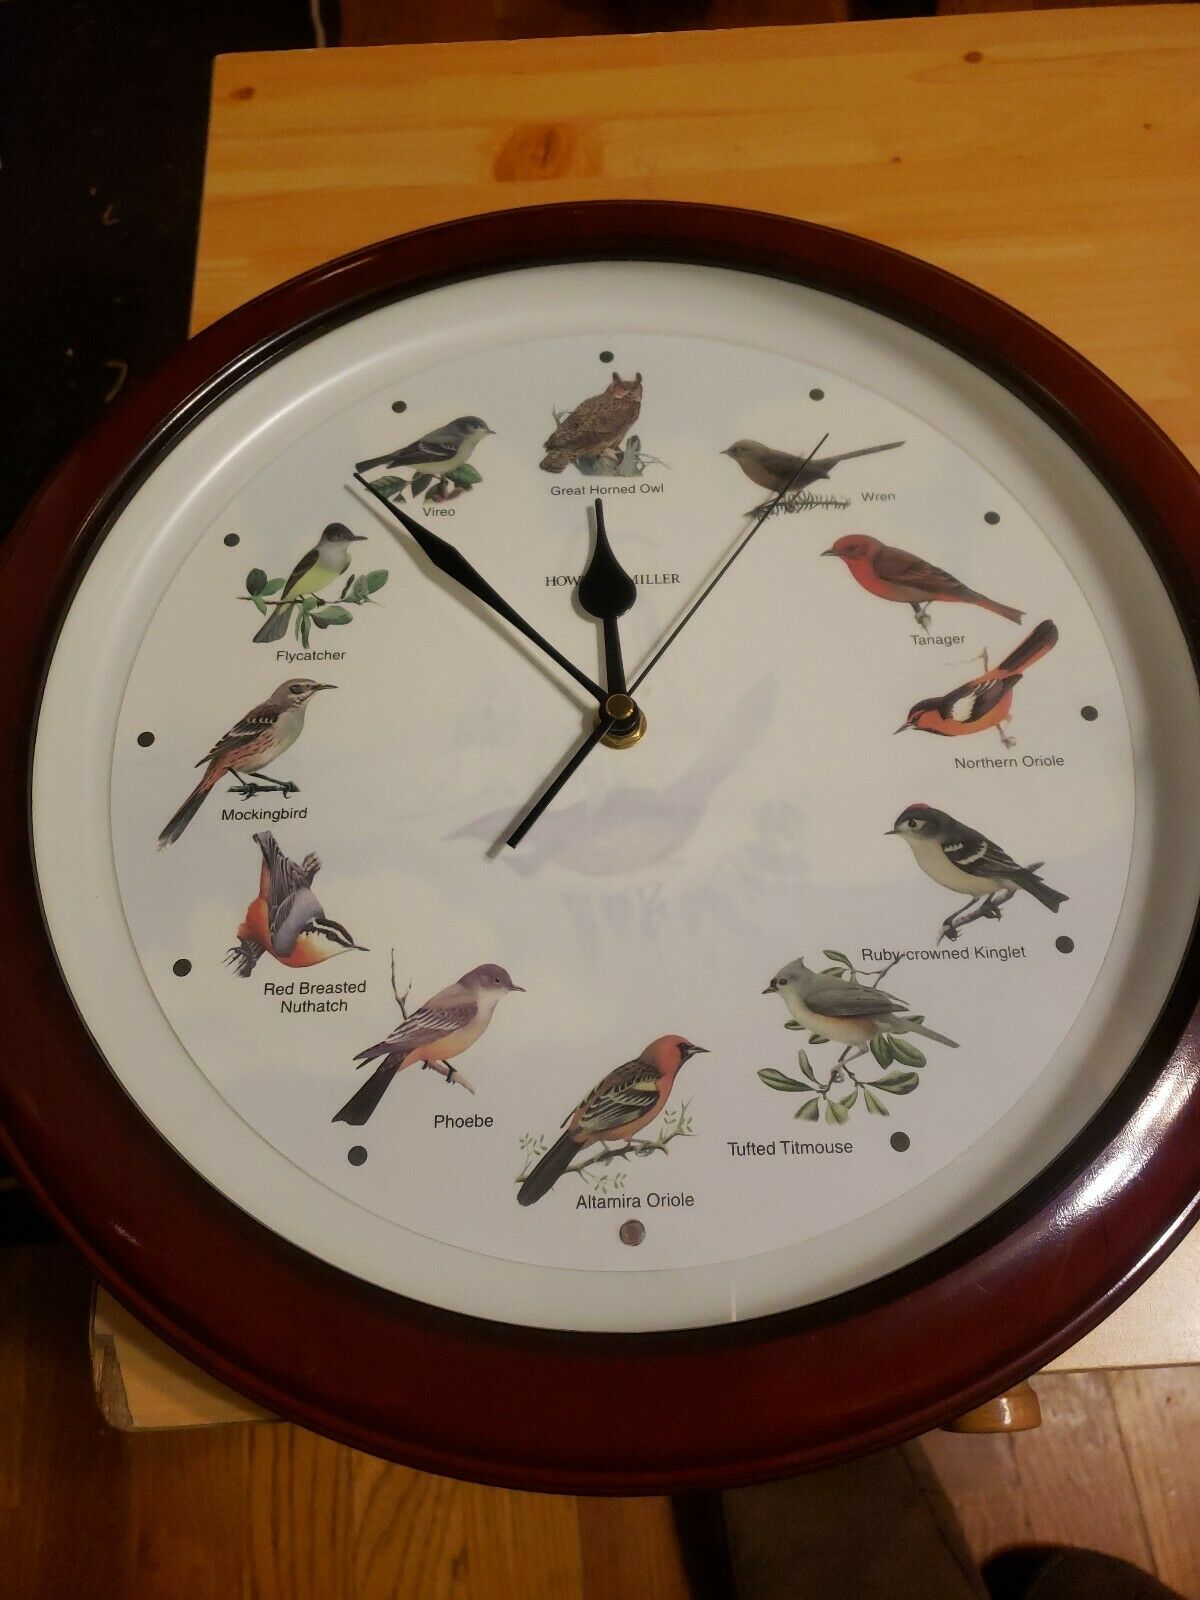
I have an old Howard Miller Songbird clock that stopped working, so I decided to digitally recreate it on the Kindle.
 User:stevenmashbur_5, ebay
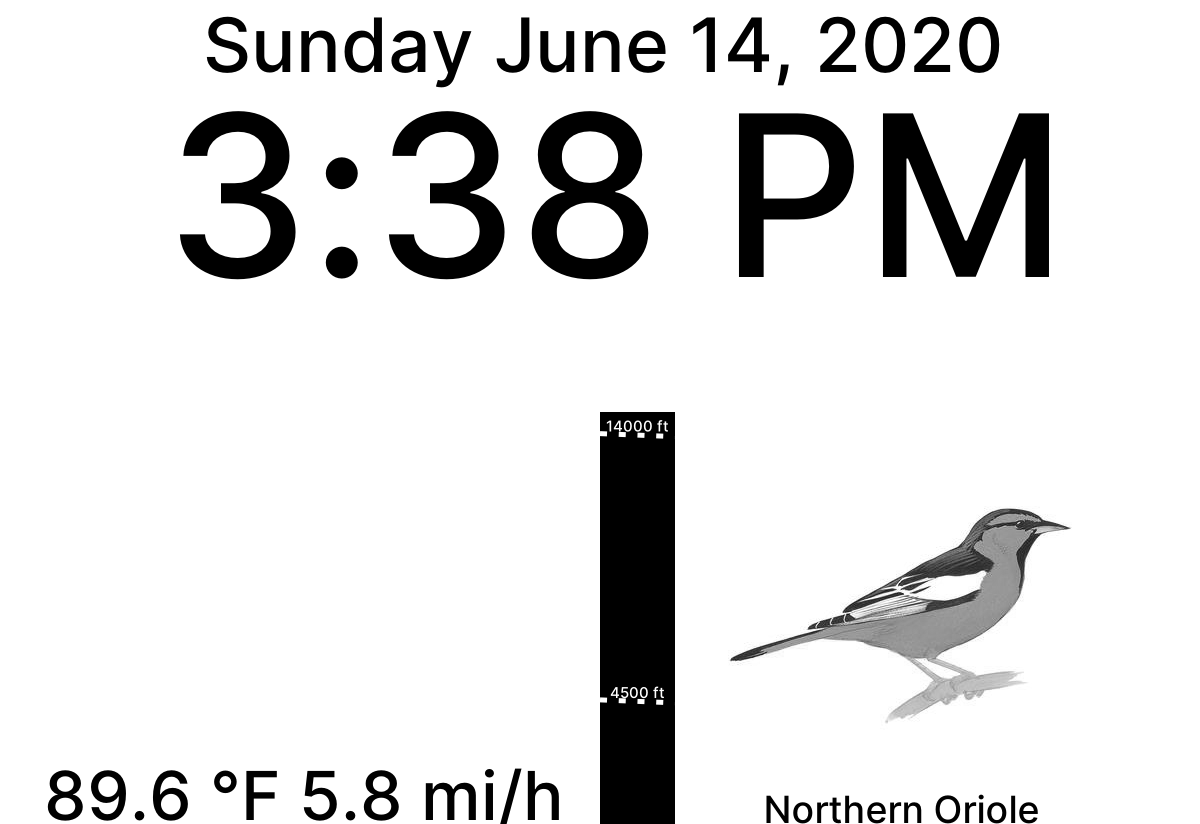
Sample image from the clock:
The source code is available on GitHub. Below, I’ve documented the process that led to the clock and how it works.
Jailbreaking🔗
The Kindle is locked down for reading and other predetermined purposes. To free the device and customize it for my needs, I had to jailbreak it. NiLuJe and the other users over at MobileRead have developed an easy, straightforward way to jailbreak Kindles. All you have to do is download their self-signed update onto the Kindle and run the software update.
USBNetwork🔗
Unfortunately, the Kindle DX Graphite does not have WiFi. It uses a tiny 3G cellular data plan to register with and fetch content from Amazon. Now that it’s jailbroken, it’s possible to work around these limitations with the USBNetwork hack. It changes the USB interface from mass storage device to RNDIS ethernet gadget. In simpler terms, instead of showing up like a flash drive, it’ll be a device at the IP address 192.168.2.2 that you can SSH into.
After installing USBNetwork with a software update, I enabled it through the sym key search menu:
;debugOn
`usbNetwork
;debugOff
If you have a newer Kindle, `usbNetwork may be ~usbNetwork
My computer recognized it as an ethernet device:
$ lsusb -v | grep Ethernet
Bus 002 Device 037: ID 0525:a4a2 Netchip Technology, Inc. Linux-USB Ethernet/RNDIS Gadget
It can be configured manually with iproute2:
$ ip a add 192.168.2.1/24 dev usb0
$ ip link set dev usb0 up
And finally, success!
$ ssh [email protected]
[email protected]'s password:
#################################################
#  N O T I C E  *  N O T I C E  *  N O T I C E  #
#################################################
Rootfs is mounted read-only. Invoke mntroot rw to
switch back to a writable rootfs.
#################################################
[root@kindle root]#
Major Setback🔗
Most of the work so far was done last summer, but I ran into a setback that put the project into limbo. I read Yifan Lu’s post about unofficially updating the Kindle from firmware v2.5.8 to v3.2.1 and decided to install it. Newer is always better, right?
After installing v3.2.1, USBNetwork stopped working and I didn’t know how to roll back the changes. I abandoned the project and forgot about the Kindle.
rootfs.img🔗
Two weeks ago, I found the Kindle lying in a drawer and decided to pick up the project again.
Several users on the MobileRead forums mentioned being stuck in a similar situation. One said it was possible to roll back a Kindle if you made a backup of the Kindle’s filesystem root, a rootfs.img.
I never made one, and couldn’t find any online from other DX Graphite owners.
This was pretty disheartening and I was ready to give up on the project again.
Luckily I discovered a rootfs.img on the Kindle itself while browsing around the storage.
It turned out that Yifan Lu’s unofficial updater made a backup of the system in v2.5.8!
I immediately transferred it to my computer just in case. If you need a copy, feel free to contact me and I can send it to you.
Serial console🔗
Flashing the Kindle with the rootfs.img turned out to be more than I bargained for. Normally, only the user storage is exposed over USB.
I needed to use the onboard serial console to open the recovery menu and enable access to the entire filesystem.
User:ebs, MobileRead forums
I didn’t have a USB to TTL UART converter, but I was able to borrow my brother’s Digilent Analog Discovery 2 which supported UART:
 SparkFun Electronics, CC BY 2.0
I rebooted the Kindle, pressed the enter key furiously from the console in WaveForms, and success!
Menu
====
3. Load MMC0 over USB storage
4. Erase MMC0
I. Initialize Partition Table (fdisk) and format FAT
O. Format and overwrite FAT partition
E. Export FAT partition
U. Update using rootfs.img.gz or rootfs.img on FAT partition
Q. quit
Choose:  3
I dd’d the rootfs.img to the Kindle:
dd if=rootfs.img of=/dev/sdb bs=4M status=progress oflag=sync
Then it successfully booted with firmware v2.5.8.
E Ink Clock🔗
Now that things were set up, I started working on the clock itself.
Hardware🔗
To bring WiFi connectivity to the Kindle, I connected it to a Raspberry Pi Zero W running Arch Linux ARM:
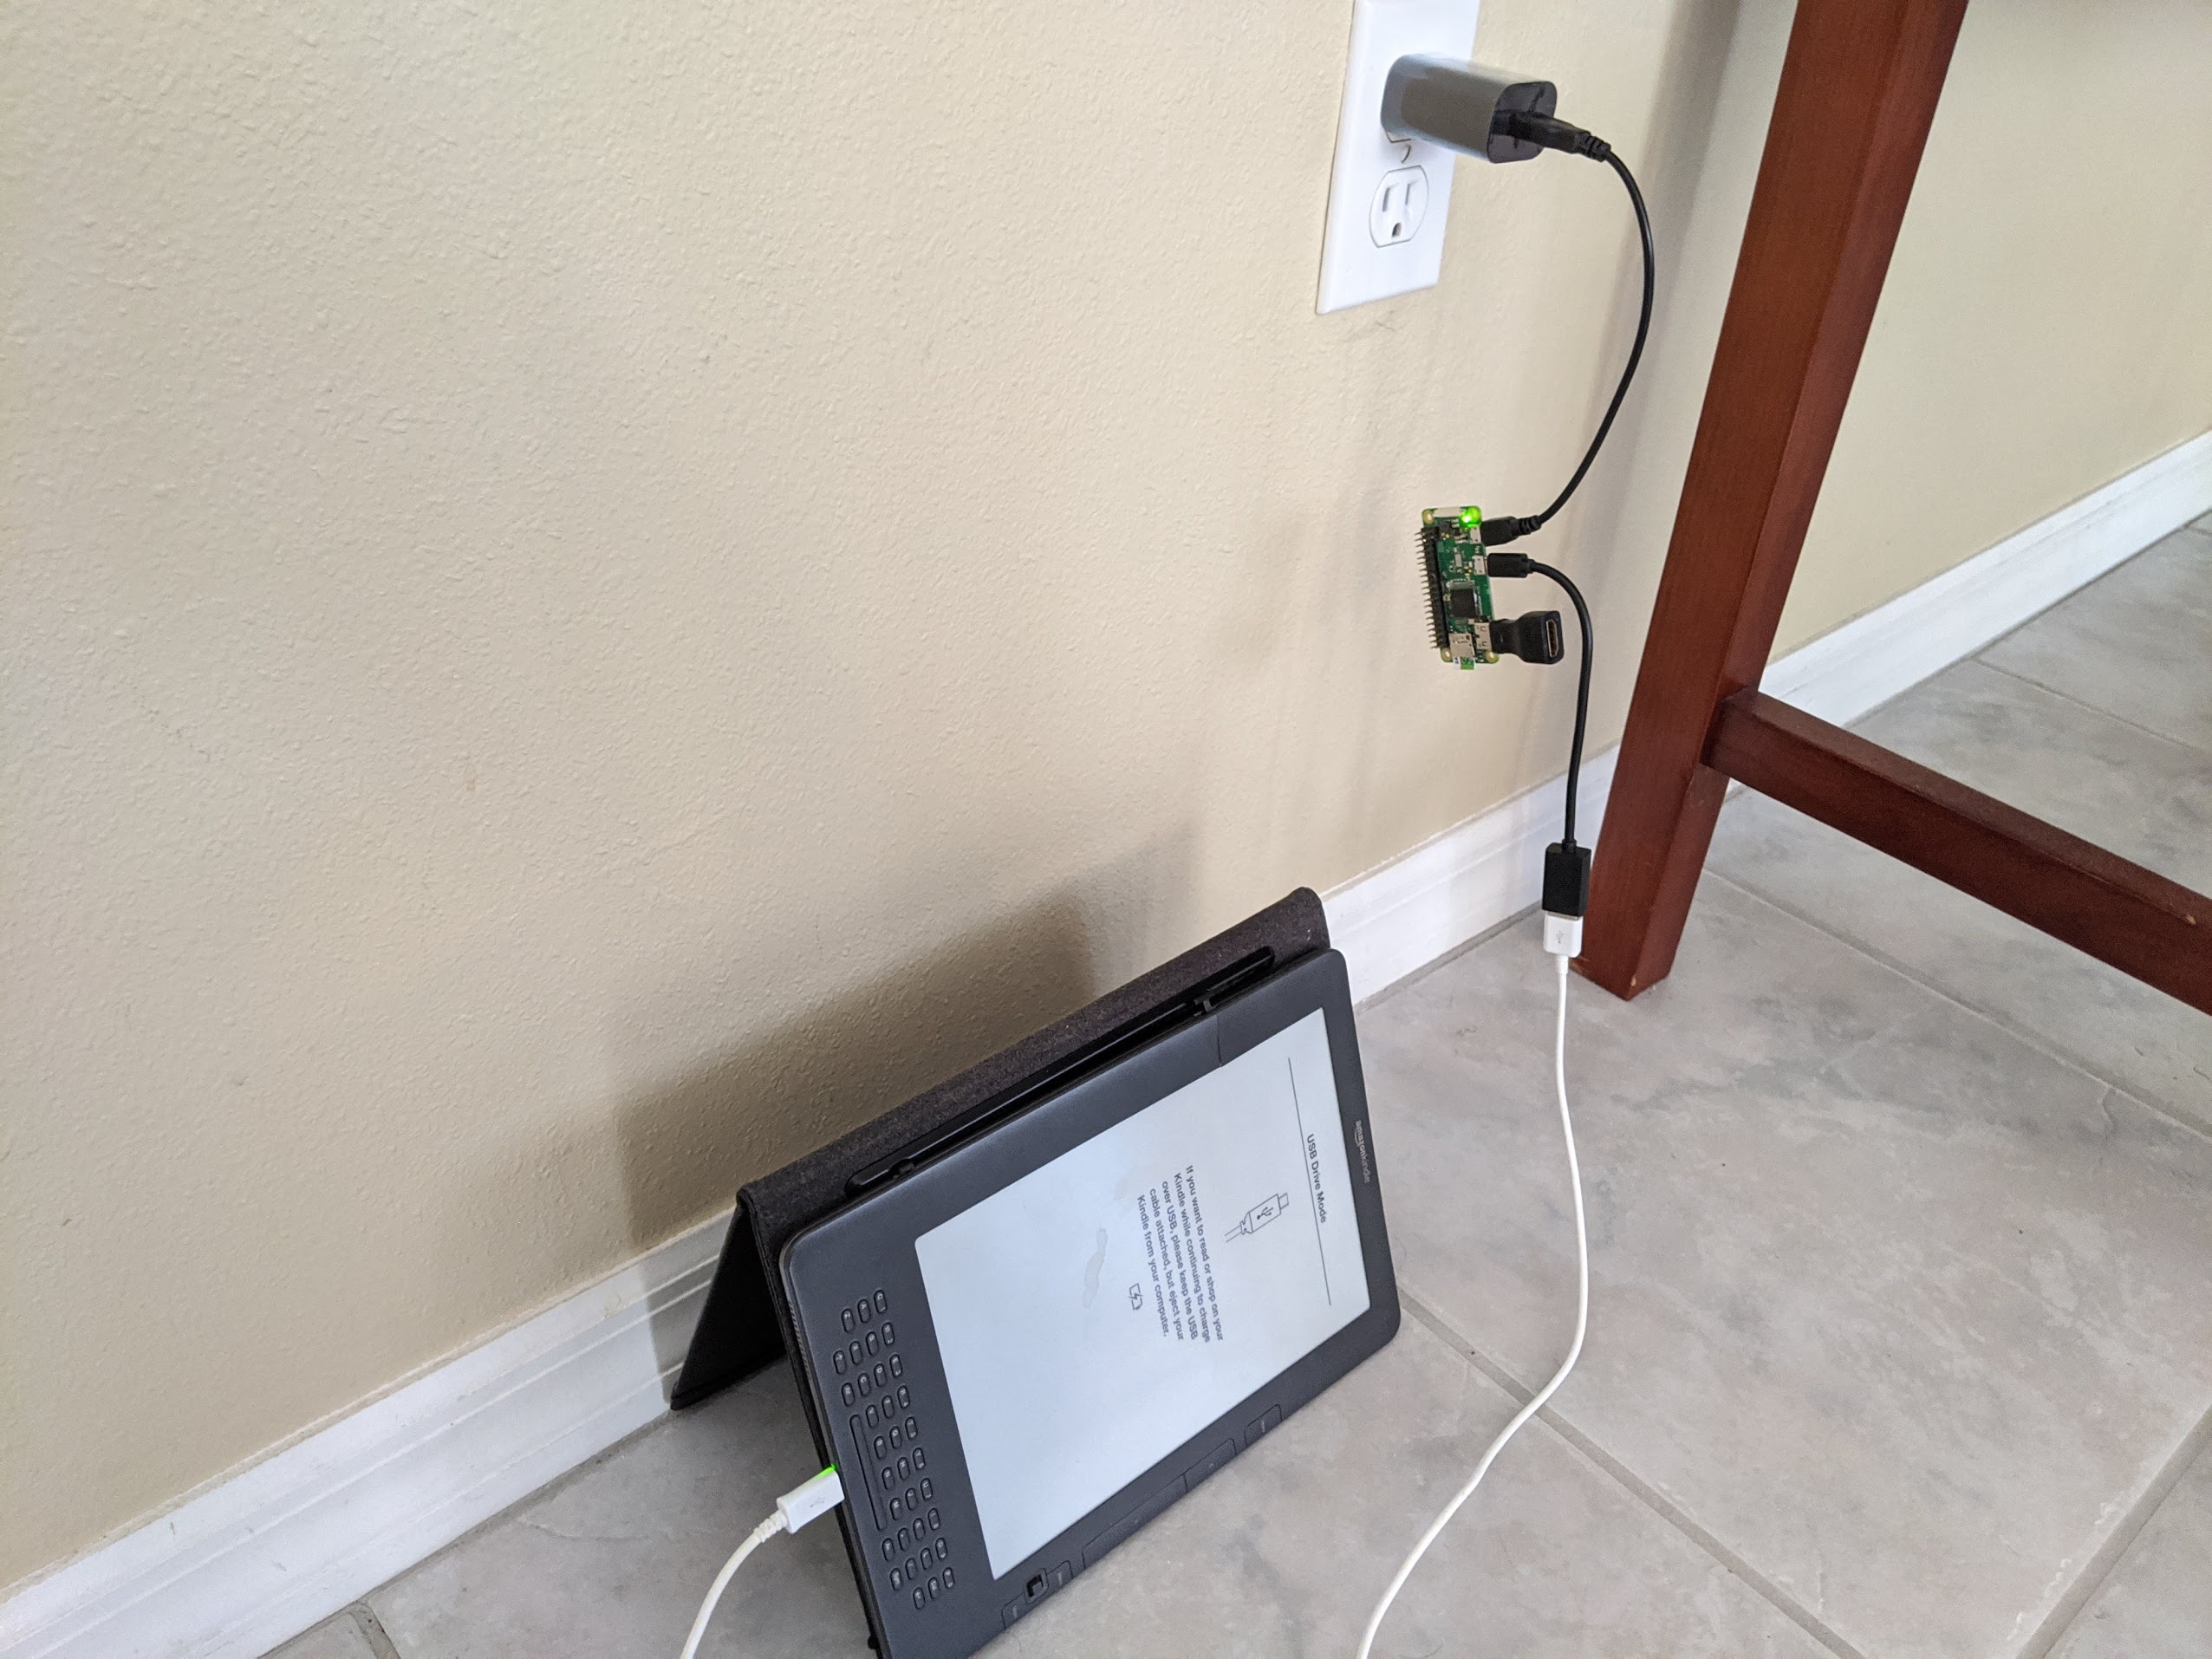
From the Pi, I could run a daemon that refreshes the Kindle every minute and plays a tune every hour.
Built-in Software🔗
eips🔗
The MobileRead wiki mentions a special Kindle command, eips, that lets you draw graphics to the Kindle screen. I originally planned to write directly to the frame buffer à la dd of=/dev/fb0, but eips has some special logic for partial screen updates that preserves the lifetime of the E Ink display. A full screen refresh 1,440 times a day is bound to wear out the screen faster than usual.
ALSA🔗
For audio, ALSA is available on Linux. I found that the Kindle has the aplay and amixer commands. This meant it could play WAV files and the volume could be controlled over SSH.
Self-written Software🔗
The next step was actually writing the daemon. I chose to write it in Rust, one of my favorite programming languages. It’s gone through several iterations and different libraries since I started writing it, so I’ll describe it in its current state.
Systemd Timer🔗
Instead of running in the background forever, systemd runs the daemon every minute on a timer. This way, a spurious error will not completely stop the clock from refreshing, and it could succeed again the next time it’s triggered.
Networking🔗
SSH🔗
The daemon integrates libssh2 to run the eips, aplay, and amixer commands.
The SSH timeout is set to one second. That way, the daemon can fail early if the Kindle is unavailable. The latency over USBNetwork is pretty low, so one second is a reasonable upper limit on connection time:
$ ping 192.168.2.2 -c 4
PING 192.168.2.2 (192.168.2.2) 56(84) bytes of data.
64 bytes from 192.168.2.2: icmp_seq=1 ttl=64 time=0.511 ms
64 bytes from 192.168.2.2: icmp_seq=2 ttl=64 time=0.397 ms
64 bytes from 192.168.2.2: icmp_seq=3 ttl=64 time=0.422 ms
64 bytes from 192.168.2.2: icmp_seq=4 ttl=64 time=0.458 ms

--- 192.168.2.2 ping statistics ---
4 packets transmitted, 4 received, 0% packet loss, time 3087ms
rtt min/avg/max/mdev = 0.397/0.447/0.511/0.042 ms
iproute2🔗
The process of manually adding the Kindle to networking is automated for better resiliency. If the Kindle is disconnected or the power is reset, the daemon can run the iproute2 commands needed to configure networking using Corentin Henry’s rtnetlink library.
Graphics🔗
Cairo is used for 2D graphics. Text is rendered with the Inter font and emojis with OpenMoji. I experimented with SVG-based rendering using Evgeniy Reizner’s resvg, but SVGs are not a good tool for text layout.
As a replacement for the bird images I used David Allen Sibley’s beautiful drawings of North American birds:
 Great Horned Owl, David Allen Sibley
Because the Kindle only has 16 levels of grayscale, some of the artwork depth is lost. This could be fixed with e-ink graphics preprocessing, but I haven’t gotten around to it.
Audio🔗
I recorded the hourly bird sounds from the clock using Audacity and cleaned them up with SoX. Listen to the Great Horned Owl:
To play them, the daemon connects to the Kindle over ssh and streams the WAV file to the standard input of aplay. This is where the power of Rust shines. The entire WAV file can be included at compile time with the include_bytes macro:
match hour12 {
    1 => aplay_audio_nonblocking(session, include_bytes!("../audio/1.wav")),
    2 => aplay_audio_nonblocking(session, include_bytes!("../audio/2.wav")),
    3 => aplay_audio_nonblocking(session, include_bytes!("../audio/3.wav")),
    4 => aplay_audio_nonblocking(session, include_bytes!("../audio/4.wav")),
    5 => aplay_audio_nonblocking(session, include_bytes!("../audio/5.wav")),
    6 => aplay_audio_nonblocking(session, include_bytes!("../audio/6.wav")),
    7 => aplay_audio_nonblocking(session, include_bytes!("../audio/7.wav")),
    8 => aplay_audio_nonblocking(session, include_bytes!("../audio/8.wav")),
    9 => aplay_audio_nonblocking(session, include_bytes!("../audio/9.wav")),
    10 => aplay_audio_nonblocking(session, include_bytes!("../audio/10.wav")),
    11 => aplay_audio_nonblocking(session, include_bytes!("../audio/11.wav")),
    12 => aplay_audio_nonblocking(session, include_bytes!("../audio/12.wav")),
    _ => Ok(()),
}
The same is done for the artwork. This is convenient since the daemon could be running with an unknown working directory.
Weather🔗
As a bonus, I added weather to the clock. Raw METAR observations are pulled from https://aviationweather.gov and parsed with Lily Hopkins’s Rust METAR parsing library.
KTPA 160153Z VRB04KT 10SM FEW070 28/14 A3006 RMK AO2 SLP179 T02830144
Which is interpreted as:
Metar {
    station: "KTPA",
    time: Time {
        date: 16,
        hour: 1,
        minute: 53,
    },
    wind: Wind {
        dir: Known(
            Variable,
        ),
        speed: Known(
            WindSpeed {
                speed: 4,
                unit: Knot,
            },
        ),
        varying: None,
        gusting: None,
    },
    visibility: Known(
        Visibility {
            visibility: 10.0,
            unit: StatuteMiles,
        },
    ),
    clouds: Known(
        CloudLayers,
    ),
    cloud_layers: [
        Few(
            Normal,
            Some(
                70,
            ),
        ),
    ],
    vert_visibility: None,
    weather: [],
    temperature: Known(
        28,
    ),
    dewpoint: Known(
        14,
    ),
    pressure: Known(
        Pressure {
            pressure: 3006.0,
            unit: InchesMercury,
        },
    ),
    remarks: Some(
        "RMK AO2 SLP179 T02830144",
    ),
}
The parsed METAR is converted into a succinct set of weather condition emojis for display (i.e 🌩️ for thunderstorm) along with the temperature and wind speed.
I’m experimenting with how best to display cloud conditions. I tried a gradient bar but the contrast was not good enough since the gradient is linear. I’m now trying a bar with dashed lines where the frequency of the dashes indicating how many okta the cloud layers are. This is hard to see from a distance so I need to find a better way.
Future work🔗
We recently set up Home Assistant at my house. It would be nice to integrate with that and display more information, like whether the garage door is open, if the air conditioning is on, etc.
 Comments